A blog about my adventures in sewing & crafting

Thursday, March 14, 2013

Increasing Sleeve Size

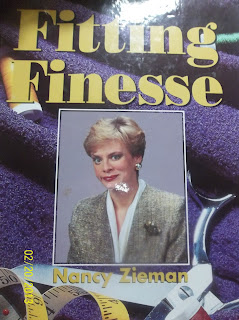
As I've previously mentioned, I love Nancy Zieman's Fitting Finesse Book.  I  think it is one of the easiest methods to follow to increase pattern sizes.

FFitting Finesse Nancy Zieman

Sleeves are one of the things that seem to always be too tight on me.  Measure your upper arm then add 2" for fitting ease. My upper arm measures 19" + 2" = 21".  The pattern measures 19" at the underarm between the stitching lines. So I will need to ad 2" to the adjusted pattern.

increase sleeve sewplus.blogspot.com
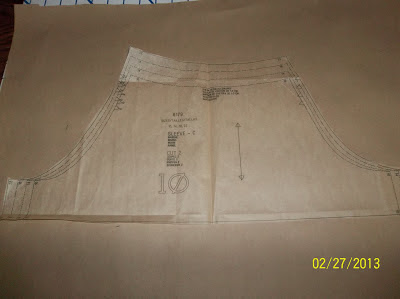
 Lay pattern on a piece of large paper.  I use brown kraft paper.  Smooth pattern out and pin down. I have a cardboard cutting mat under mine.

trace origional pattern to increase sleeve pattern
 Trace around sleeve pattern with one color marker.  

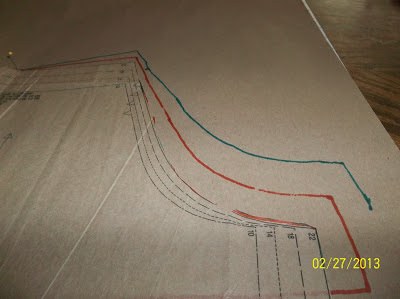
mark increase on pattern to increase sleeve pattern
 Mark increase out from the cutting line.  Since there are 4 cut edges and I need to increase 2", each cut side will be increased 1/2".  Orange is original, green is the new increased size.

pivot pattern to increase mark to increase sleeve width
 Remove all pins.  Keep one pin in stitch line at center point.  Pivot pattern to increase mark and retrace with another color pen.  Do both sides of the sleeve this way.  Remove center pin and move entire pattern to increase line on the side.  Finish tracing to the hem line.

pivot pattern to increase mark to increase sleeve width retrace pattern
 This method always fits  into the armhole of the pattern so nice.

increase sleeve pattern pivot slide method Sewing Finesse
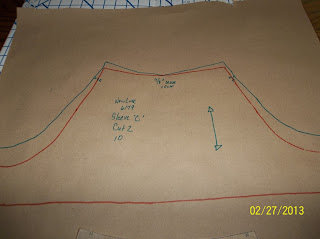
Increased sleeve above the original pattern piece. 

The pattern is still intact and undamaged and now you have a correct size sleeve for you.  Make sure you mark your new pattern pieces with markings from the original and include the pattern number.

I have used  this method many times and as long as you measure correctly, the sleeve always comes out perfect.

I am in progress of making another top.  Will show you more pictures soon.

Until next time......

Bonnie

Friday, March 1, 2013

Sewing Area Re-arranged


I just recently got a little cleaning bug and re-arranged my sewing area.  I had hoped to make more room to sew but sometimes things don't work out like that.  I have very happy about my new arrangement.  I am able to get in and out of the sewing machine much easier.  I only have about a 6 foot by 5 foot area.  Talk about small!


Sewing area room sewplus.blogspot.com
 Old view of sewing area.  I had to squeeze between the table and the ironing board.
I felt the doors open wasted alot of space I could be using. The three drawer plastic thing on the left was a catch all from the kitchen. (pens, papers, pictures).  I added a smaller one on top so the kids couldn't put stuff on it!


Pattern storage dresser sewplus.blogspot.com
 Nothing has changed here.  I still keep all my patterns in this dresser.  I did go through them and clean them up and weed out the ones I didn't plan on making ever! I have the patterns organized: top drawer- Dresses (me), second drawer-Tops (me), third drawer-Outfits (me), fourth drawer-Anything for Girl M, Bottom drawer-Coats/Jackets, Sleepwear/Under garments, and Pants/Shorts Patterns for (me).  I further organized each drawer by maker and pattern number.  Sometimes I'm just nerdy like that!


My junk area.  No matter how much I cleaned at it, it was a catch all. It's now gone!  I have a small computer desk there now and I get to work from home!


New sewing area re-arranged sewplus.blogspot.com
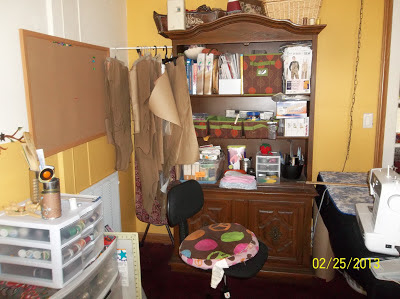
New re-arranged work area

I removed the door off the cabinet.  I used a tension rod on the left to hold my paper patterns. I sorted all my spools of threads in the rubbermaid container on the left.  I like having all my thread where I can reach it easily.
I moved the sewing table to the right.  I had a 5' folding table and I put a piece of plywood on top to make it a little sturdier.  I also made a hanging lamp so I could use my Ott-light bulb.


New sewing area re-arranged sewplus.blogspot.com iron serger

I put a cork board up to tack up my pattern directions.  I use one end of the table for ironing.  Since this table is a little wider, having the sewing machine back to back with the serger is not so tight.

I covered the table with a piece of black fabric so that it looked a little more uniformed.

Boy T is 19 and was just hired on with the State.  I really could use his room for a sewing/craft room but he tells me he's NOT moving out.  He says he has it made here!  I don't want him to go but I sure could use my own space!

I have some exciting items I want to sew this month.

1.  A pink scoop neck/a-line dress
2. a kimono over-top in a green fabric with pink embroidery
3.  summer tops
4. curtains for Girl M's windows
5. Another dress
6.  Girl M some summer tops
7.  Maybe try a pair of capri or shorts for me.....

Until next time.....

Bonnie

What I made in February

I only made three items in the month of February. I took my time and made a muslin for one of them so does that really make it 4 items?

I'm proud I took my time.  I used my serger more and I did ALOT of pressing.  I do think that these items will get a lot of wear.

McCall's 3735 dress pattern gingham blue check summer sewplus.blogspot.com

New Look 6485 Tunic Top

Butterick 5764 Knit Maxi Dress

I am excited about spring!  I have tomato seeds planted in my window sills.  We planted our garden with peas, beans, green squash, cucumbers, eggplants, wax beans and we transplanted some tomato plants out there too.

I have two hens setting on eggs.  They should be ready about the 21st of March (That's my birthday)!  My very own present to me!

Happy Spring & Happy March

Until next time......

Bonnie